Affiliate Disclaimer: We earn commissions through affiliate links. Your support helps us provide valuable content. Click here to see the full disclosure.
From Closet to Laundry – A step-by-step guide to creating a Laundry Closet

Are you tired of trekking to the basement or lugging your laundry to the laundromat? If you have a spare closet and a desire for convenience, you can transform it into a fully functional laundry closet! Adding a laundry space adds convenience to your day-to-day life – but it is also a great way to add value to your home. In a 2+ story home – having laundry on the same level as most bedrooms is a huge plus. We’ll guide you through the process of creating your very own laundry space, from running the correct wiring load to adding the finishing touches.
We completed this transformation in our own house. The ease of having laundry on the bedroom level of the home saves countless trips to the basement & significantly improves quality of life. Follow along here – and as always connect with us for a consultation if you are looking to improve ‘laundry life’!
Assess and Plan
The first step in this project is to choose the right closet for your laundry transformation. It is critical to ensure that the closet is spacious enough to accommodate your washer and dryer. If you are moving your current washer and dryer, measure their dimensions (plus a bit of wiggle room); if you are purchasing a new washer and dryer – grab the spec sheets from the manufacturers’ website (it will be readily available). You want to make sure you are leaving ~12 inches of space behind the dryer to accommodate the dryer vent. You also want to make sure there is room to run the wiring and plumbing for the washer.
Step 1: Run the Correct Wiring Load
Before you can install your washer and dryer, you need to make sure your closet is equipped with the necessary electrical outlets. If the closet lacks a dedicated 240V outlet for your dryer, it’s crucial to consult an electrician to assess your wiring and ensure it can handle the load. This may involve upgrading the electrical system, a job best left to professionals.
In our specific scenario – we had recently upgraded our electrical panel to 200V. When this was done, we asked our electrician to run a 240V outlet into the closet (as we knew we were going to tackle this reno project eventually). Electrical is no joke – and I can’t stress enough how important it is to have a licensed professional ensure your house is properly equipped before proceeding.

Step 2: Run water lines for the Washing Machine
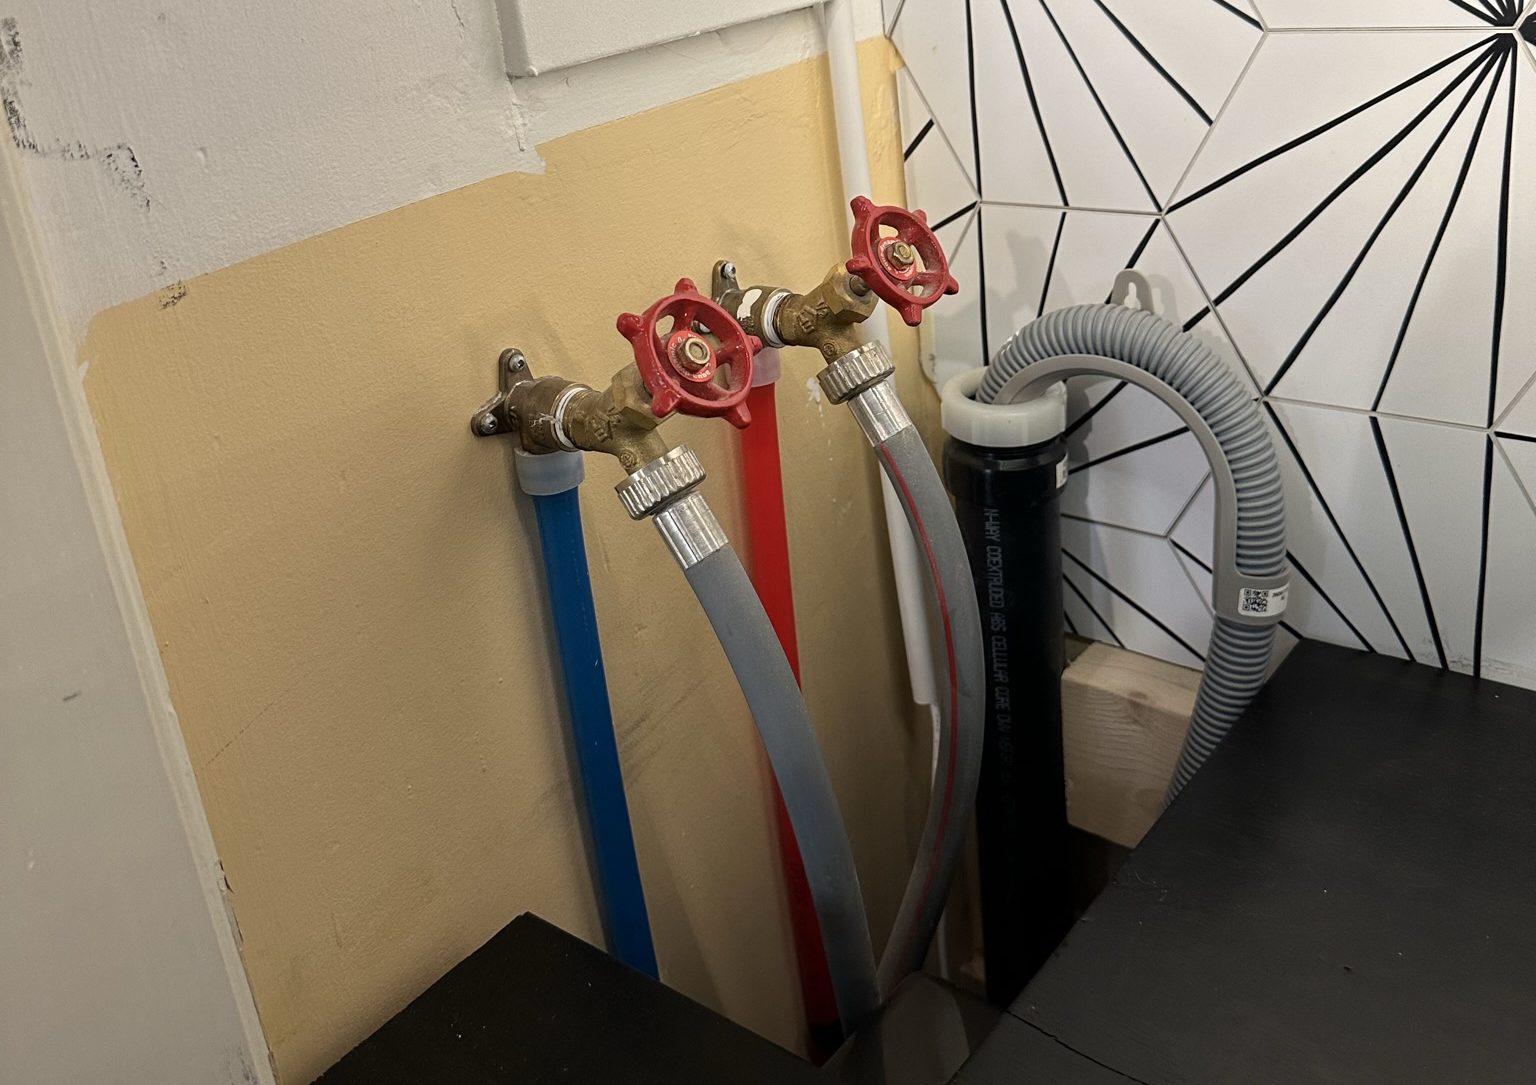
Your washing machine will need both hot and cold water supply lines to function properly. In an ideal scenario, the closet you are transforming into laundry will be near one of your bathrooms. In this case – you will be able to pull the water lines going to your bathroom, into the closet for water supply. To do this – you will need to consult a plumber to correctly splice the old lines and run new lines into the water housing.
When running your new water lines into your closet – you will want to ensure you have easy access in the future to shut-off values. An outlet box like this one will give you easy access to these shut-off valves and will ensure you can minimize any damage.
Step 3: Add Ventilation
Proper ventilation is essential in a laundry closet to remove excess moisture and prevent mold and mildew. You’ll need to run a ventilation duct from the dryer to the exterior of your home. You will want to make sure this exhaust duct takes the shortest distance from the laundry closet to the outside (that could be sideways or it could be up through the roof).
Once you locate the shortest distance, cut a hole to accommodate the duct. Depending on if you are going through brick, siding or the roof – you may need some special equipment to do so. Check out your local Home Depot for tool rentals for these specialist equipment. Install a dryer venting box, like this one, in the wall (added simplicity)Finally, install the vent hood on the exterior to ensure efficient air circulation.
Adding Style and Functionality
Now that the fundamental elements are prepared for your laundry closet – it’s time to add some style for that ‘wow’ factor. This is where you can make everyone jealous 🙂
Step 4: Remove Old Closet Shelves
Chances are, your spare closet is currently used for storage. Clear it out and remove any old shelves or other obstacles that might hinder your laundry machines’ installation. This is an excellent time to declutter and get rid of items you no longer need.
This may require you to clean and patch-up some holes in the wall as you’ll want to have a smooth surface for the backsplash. We did some quick patch jobs with drywall mud and sandings – and easy to learn skill for any DIYer.
Step 5: Prepare and Paint
With the closet cleared, it’s time to prep the space for its new role. Patch any holes or imperfections in the walls and apply a fresh coat of paint. Light, neutral colors work well, as they can make the space feel larger and brighter. Don’t stress if your wall isn’t perfectly flat or has some small imperfections. Adding paint will bring some consistency to the space — using white paint will brighten the whole area. Chantilly lace is our go-to white paint — it is the whitest white you can buy. Using a consistent white paint through your renovations gives you more bang for your buck (you can buy larger quantities) and also makes it much easier to do touch-ups later.
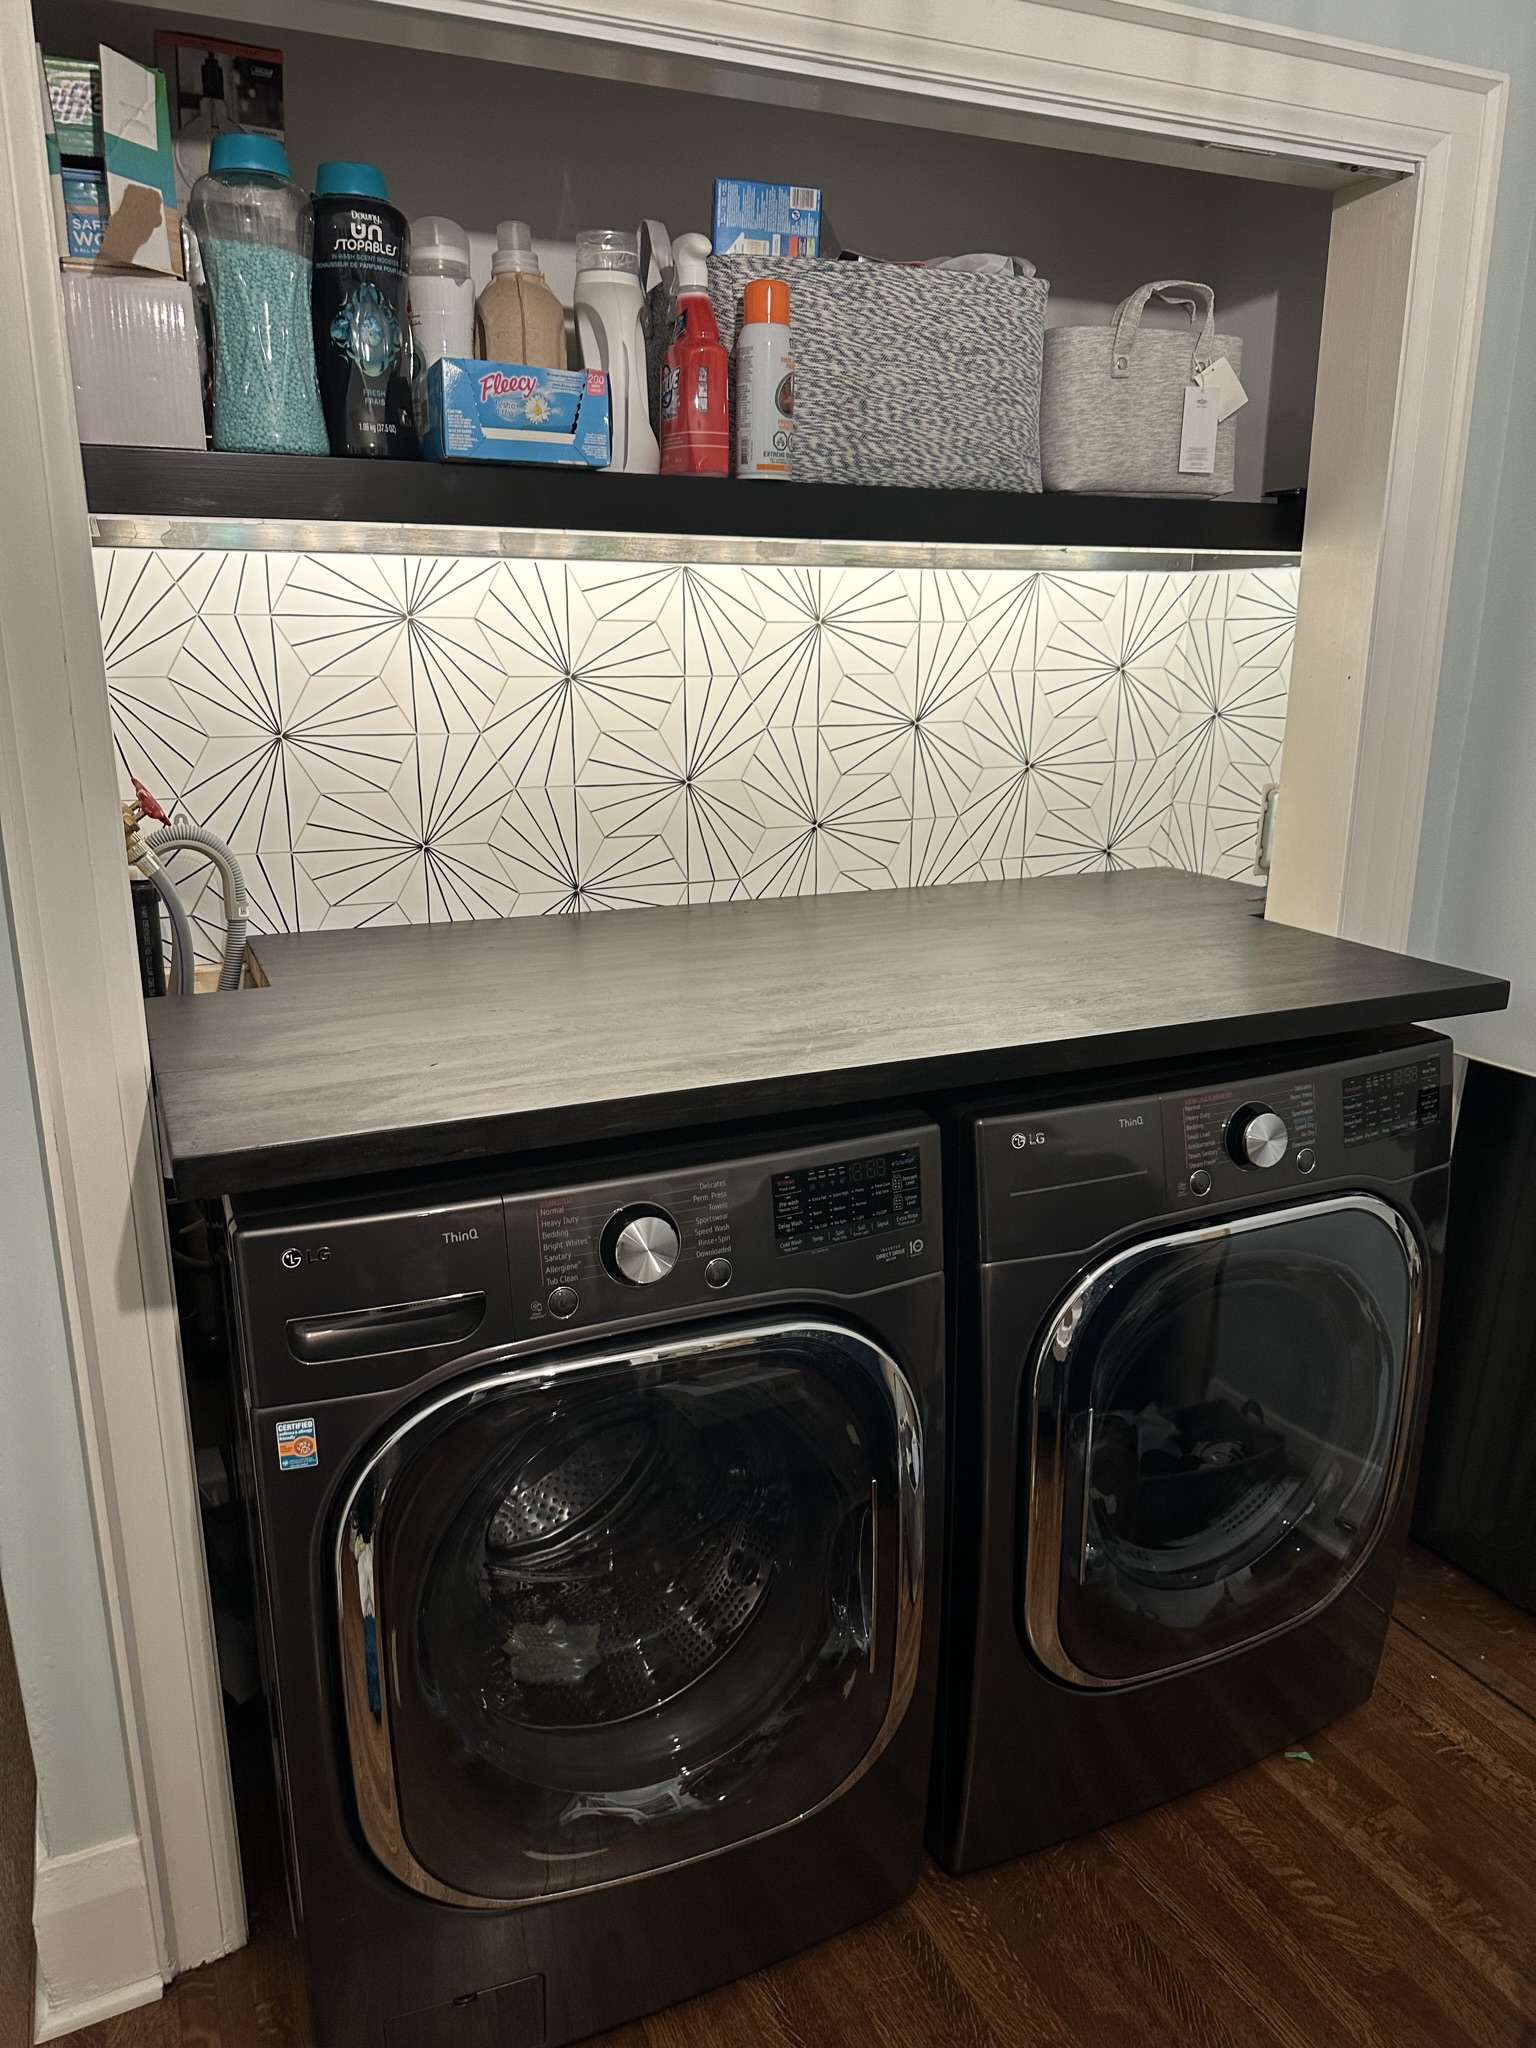
Step 6: Add a Backsplash
Adding a backsplash to the area is a great way to add sophistication to your space! We opted to install this peel-and-stick backsplash due to install simplicity and design. You’ll want to make sure your wall is clean and free of debris, you have some construction adhesive (for extra hold) and an exacto knife for cutting tiles, and some painter’s tape to hold things in place while it all cures. Check out this in-depth article on installing a peel-and-stick backsplash – DIY style.
Step 7: Add New Shelving
Now, let’s focus on organization. Install new shelves above and/or beside your washer and dryer to store laundry supplies, detergents, and other essentials. Adjustable wire shelves are a popular choice because they can be customized to your specific needs. Simple shelving above your washer and dryer will ensure all of your supplies will be within reach. If you have the space, consider a combination of open and closed shelving to keep the space tidy and functional.
Step 8: Add a Tabletop
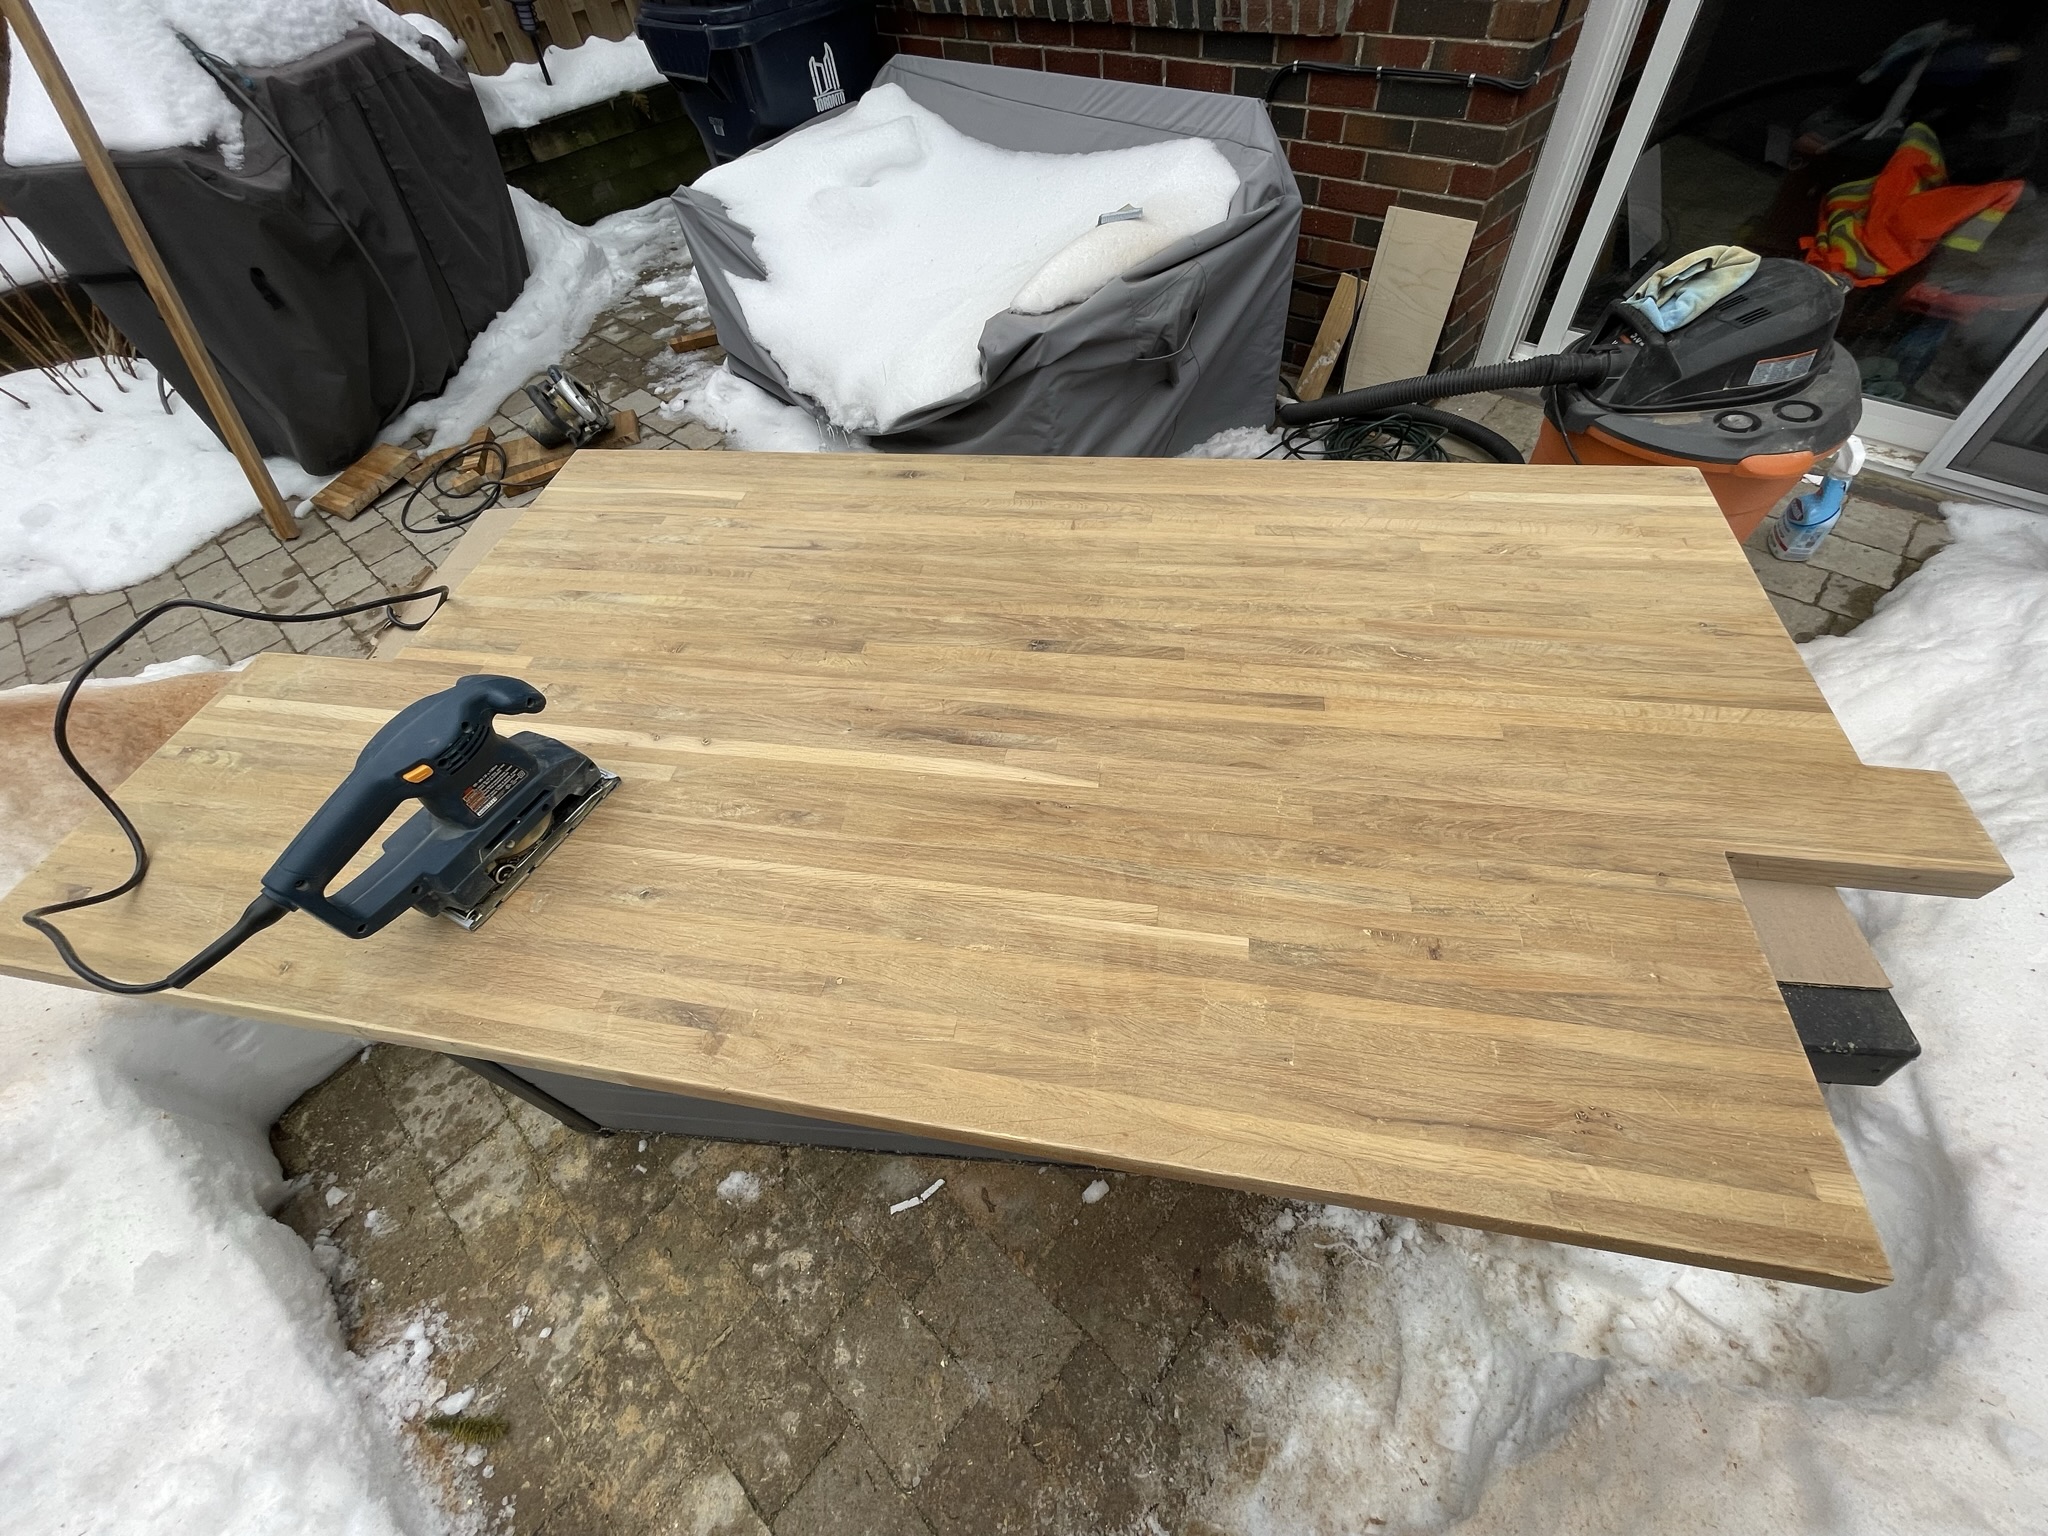
A tabletop is one of the most functional elements you can add to your laundry space. Above all else – it provides a readily available flat surface for folding clothes and other tasks. You have many options of material for this countertop. At the top end of the budget, you can look for solid stone like quartz. Mid-range you can use a butcher block countertop and customize the way you want (what we chose – see the prep of the surfance here). If budget is more of a consideration – Laminate countertops will also suffice (the material we choose for rental apartment laundry spaces). Make sure you measure the interior dimensions where the tabletop will go, add supports around the sides, and ensure the top will be strong enough to withstand multiple laundry baskets.
Step 9: Install the Washer and Dryer
With the wiring, ventilation, and shelving in place, it’s time to install your washer and dryer. Ensure they are level, and all the necessary connections are made according to the manufacturer’s instructions. Don’t forget to attach the dryer vent to the exterior duct.
Step 10: Organize and Decorate
Now that your laundry closet is fully functional, take the time to organize your supplies and personalize the space. Consider adding a few decorative touches, like a laundry-themed art piece or a stylish hamper, to make the space more inviting.
Turning a spare closet into a laundry closet is a fantastic way to enhance the functionality of your home. By following the steps outlined in this guide, you can transform an underutilized space into a practical and organized laundry area. With the right planning and some DIY skills, you’ll be enjoying the benefits of your laundry closet in no time.
Reach out for a free consultation if you are looking to add a laundry space to your home. We can give you the support and guidance needed to transform your space and maximize this investment in your home.